If you’re like most travelers, a trip to the higher latitudes to see the aurora borealis is somewhere on your bucketlist. And it’s not enough to just see the Aurora Borealis – you really want to take your own photos of the northern lights. Aurora photography isn’t incredibly complicated, but it does rely on some trial and error. If you’re interested in northern lights photography, this is a good place to start.
Here is everything we learned about how to photograph the northern lights.
How to See Auroras
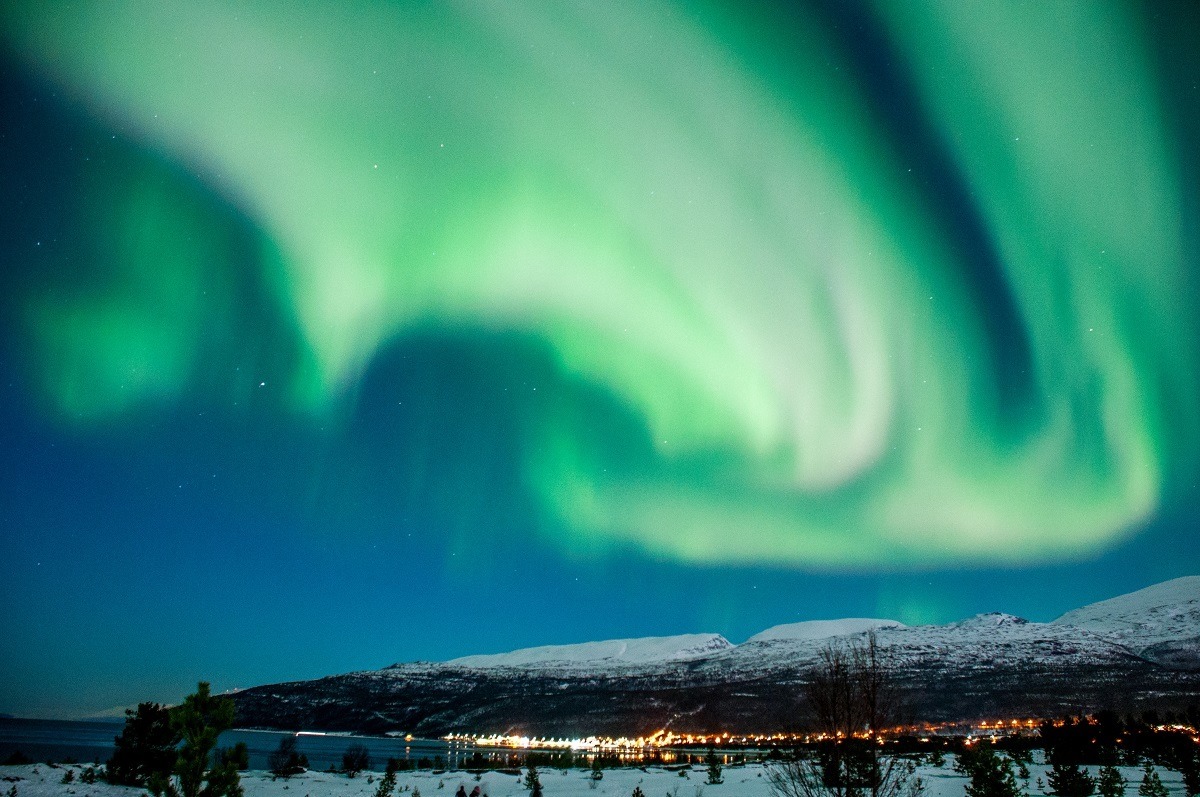

First, you need to be in a place where you can see the northern lights. That means somewhere really far north. Destinations in Alaska, Canada, Iceland, Norway, Sweden, and Finland are all popular destinations.
But being in the right place isn’t enough. You need to away from cities in areas with really dark skies. Light pollution from cities (even small towns) will ruin your photos. Taking a tour with a local who knows the area can be helpful. We took an Aurora tour in Tromso, Norway and it was an incredible experience.
Finally, you need a bit of luck. You need cloudless nights. These aren’t guaranteed. But if these factors come together, you can have an amazing pictures of northern lights to look back on your trip.
Knowledge can also help bridge the gap. Check out our Frequently Asked Questions about the Northern Lights for tools that can help improve your chances to see the Aurora.
Camera Equipment

If you have your heart set on taking pictures of the aurora, you need the right gear. The good news is you don’t need a separate northern lights camera, you regular camera will likely work fine. Here are some things that will make it easier.
Camera
You need a DSLR or mirrorless camera. (Note: If you are looking for a camera, please consult our camera guide). Once you have your camera, take some time learning your camera settings. The time to learn your camera is when it is warm and you have daylight, not when you are out in the dark trying to take pictures of the aurora borealis.
Lens
In taking northern lights pictures, you want a wide-angle lens. It will allow you capture the most of the landscape and more of the sky. Ideally you’re looking for something in the f1.8 or f2.8 – a wide-angle with a fast aperture (speed).
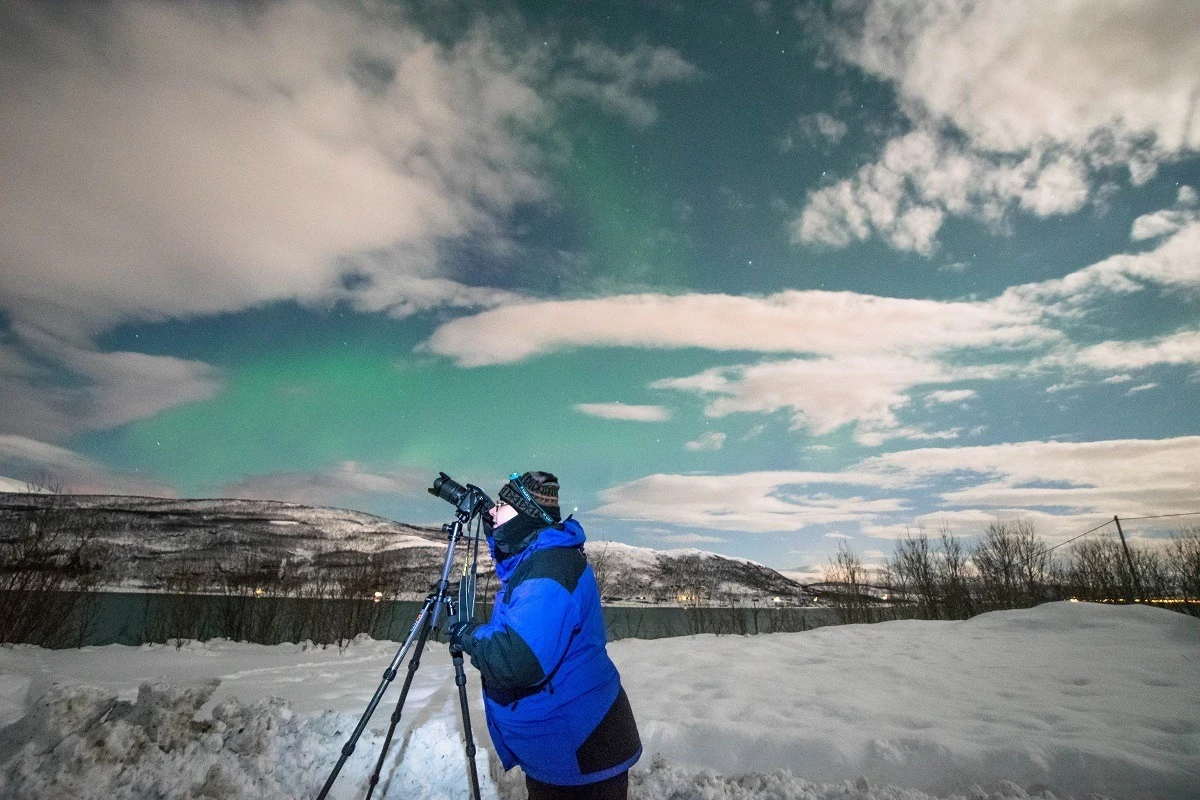
Tripod
Having a tripod is absolutely required. You cannot take pictures of the polar lights by hand. Any amount of camera movement will cause blurriness in the image, so you need to keep the camera absolutely motionless. (We use a MeFoto tripod.)
Remote release
You’ll need a way to take the picture where you don’t touch the camera (touching the camera will introduce movement and make the images blurry). We know this sounds unnecessary, but it really is critical. We have a battery-operated remote (infrared), which has never really worked properly on our camera. We have a remote with a cord, but the battery drains quickly.
The best solution has been a radio wireless remote control. If you don’t have an exernal remote, you can try to use the built-in timer on a several-second delay. That worked great!
Camera Settings

But having the right gear alone is not enough to take great pictures. You need to put your gear to optimal use by using the right settings and putting yourself in position to take great pictures.
Camera Focus and Lens Zoom
How do you know how to focus your camera? The best way to do this is during the day and look for something very, very off in the distance and focus on that. However, most camera lenses have a feature for this. On the side of your lens, look for the infinity symbol (∞) and set your lens to that. Then adjust your focus off of that. From our experience, we would set to infinity and then back off of it just a little bit.
Better yet, most modern DSLRs will allow you to use your Live View function and then zoom in on a star or the moon and manually focus on it. Pro-tip: If you tape the lens into place during the day, you won’t have to try to focus during the night.
Manual Settings
Automatic photos are fine during the day or inside, but at night, you need to be able to completely control the camera. Set your camera to manual (usually found on the front of the camera). Next, set your lens to manual (usually on the left side of the lens). If your lens has some kind of image stabilization function, turn it off (if you have this, it is usually next to the “manual” function on the lens).
Flash
If you’re trying to capture images in the night sky, you don’t want to use your flash. Ensure your flash is turned off.

ISO Light Sensitivity
Adjust your light sensitivity function on your camera. This is called the ISO setting (back in the day of 35mm film, ISO was the film speed). The higher the ISO, the more sensitive it is to light (and the less light you need to take the picture). Start by setting your ISO to 1600 and then adjust from there.
Aperture
The aperture is the size of the opening of the camera, which controls how much light gets in. In northern lights photography, you want the absolute biggest opening possible (which means the lower f-number or f-stop number).
The bigger the opening, the faster the image can be taken, the crisper the image, and the more detail that can be captured. Start at the absolute lowest f-stop number you possibly can, which is probably around f-1.8 or f-2.8 (although you can also get good pictures at f-4 if the lights are bright).
Shutter Speed
You want this to be as fast as possible while still absorbing the most amount of light. Since the lights are moving in the sky, the more time, the blur you’ll capture. From our experience, it’s best to start with a shorter shutter speed and then work up to where the images look the best.
We started between 5-10 seconds and moved up to around 20 seconds for some shots. However, if you leave the shutter open for a long period of time while the lights are moving (or dancing), you’ll have some motion artifacts in your photos.
How to Take a Northern Lights Selfie
Want a selfie with the Aurora Borealis? Want to show your friends a cool picture of you under the aurora borealis? If so, you should follow all of the photography steps above as a starting point.
When you are ready to take your picture, stand with yourself in the foreground and the northern lights in the background. Have a friend hit the shutter on your camera (assuming you are using the built-in delay function) or using your radio remote control. You need to stand absolutely motionless during the entire exposure time!
Once the camera begins the exposure, your friend or needs to flash you very quickly with a flashlight or the flashlight feature on your smartphone. You should only be illuminated for just a second of the overall exposure time. Your image should turn out looking something like this:


Smartphone Photography
It is absolutely possible to take decent smartphone northern lights photos. The basics are the same. You need to use a tripod (such as the KobraTech Smartphone Tripod). You should use your smartphone’s manual settings.
Considering using photography apps (such as NorthernLights app or LongExpo Pro) which allow you more control over the camera. Many of these apps allow you to adjust the functions and implement the settings we provide above.
Lance Longwell is a travel writer and photographer who has published Travel Addicts since 2008, making it one of the oldest travel blogs. He is a life-long traveler, having visited all 50 of the United States by the time he graduated high school. Lance has continued his adventures by visiting 70 countries on 5 continents – all in search of the world’s perfect sausage. He’s a passionate foodie and enjoys hot springs and cultural oddities. When he’s not traveling (or writing about travel), you’ll find him photographing his hometown of Philadelphia.